Premium Networks
One-click authorization
Choose the network, approve secure access and select the profile, Page or group you want to connect.
How Post.Social works
Draft your post, upload your media once, and choose where it should appear. Keep the same version everywhere or fine-tune captions for specific networks, then publish immediately or schedule—all from one clear workflow.
The whole process at a glance
Set up
Name the brand or site.
Connect
Add the accounts you use.
Create
Write and upload once.
Choose
Select target accounts.
Adjust
Change only what is needed.
Publish
Send now or schedule.
Review
Track delivery results.
Start organized
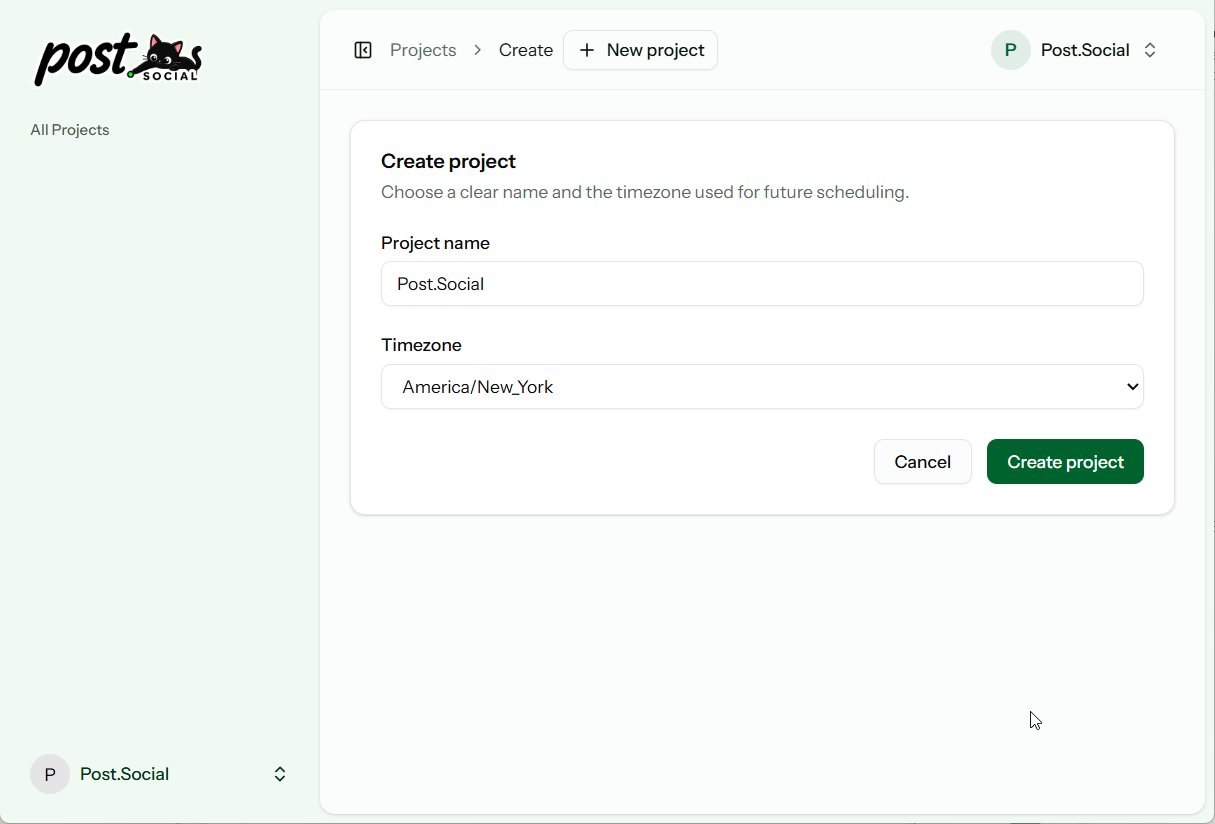
Post.Social organizes your work into Projects. A Project is where a brand, business or website keeps its connected channels, draft posts, schedule and publication history together.
Managing a single brand? One Project is all you need.
If you run multiple brands, separate Projects ensure you never send content to the wrong account or mix up timezones.
Connect your accounts
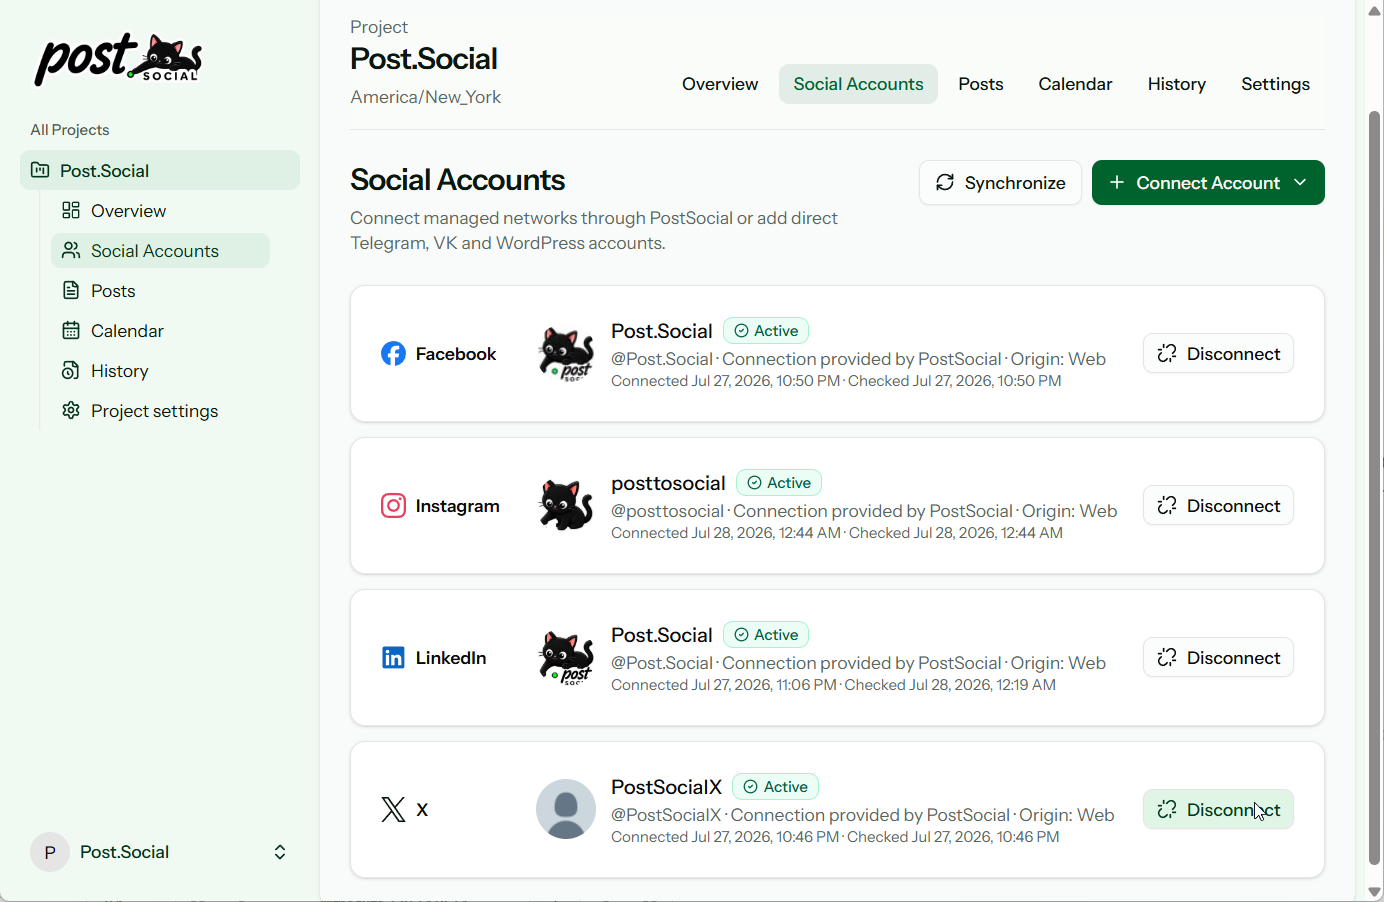
Connect all your social profiles, Telegram channels and WordPress sites. They stay ready in Post.Social, so you never have to sign in to each platform separately just to post an update.
Premium Networks
Choose the network, approve secure access and select the profile, Page or group you want to connect.
Standard Networks
Follow simple guided steps for Bluesky, Telegram, VK or WordPress, with instant connection verification.
Plans are based on delivered posts, not the number of connected accounts.
See supported networks and setup details →Create the shared post
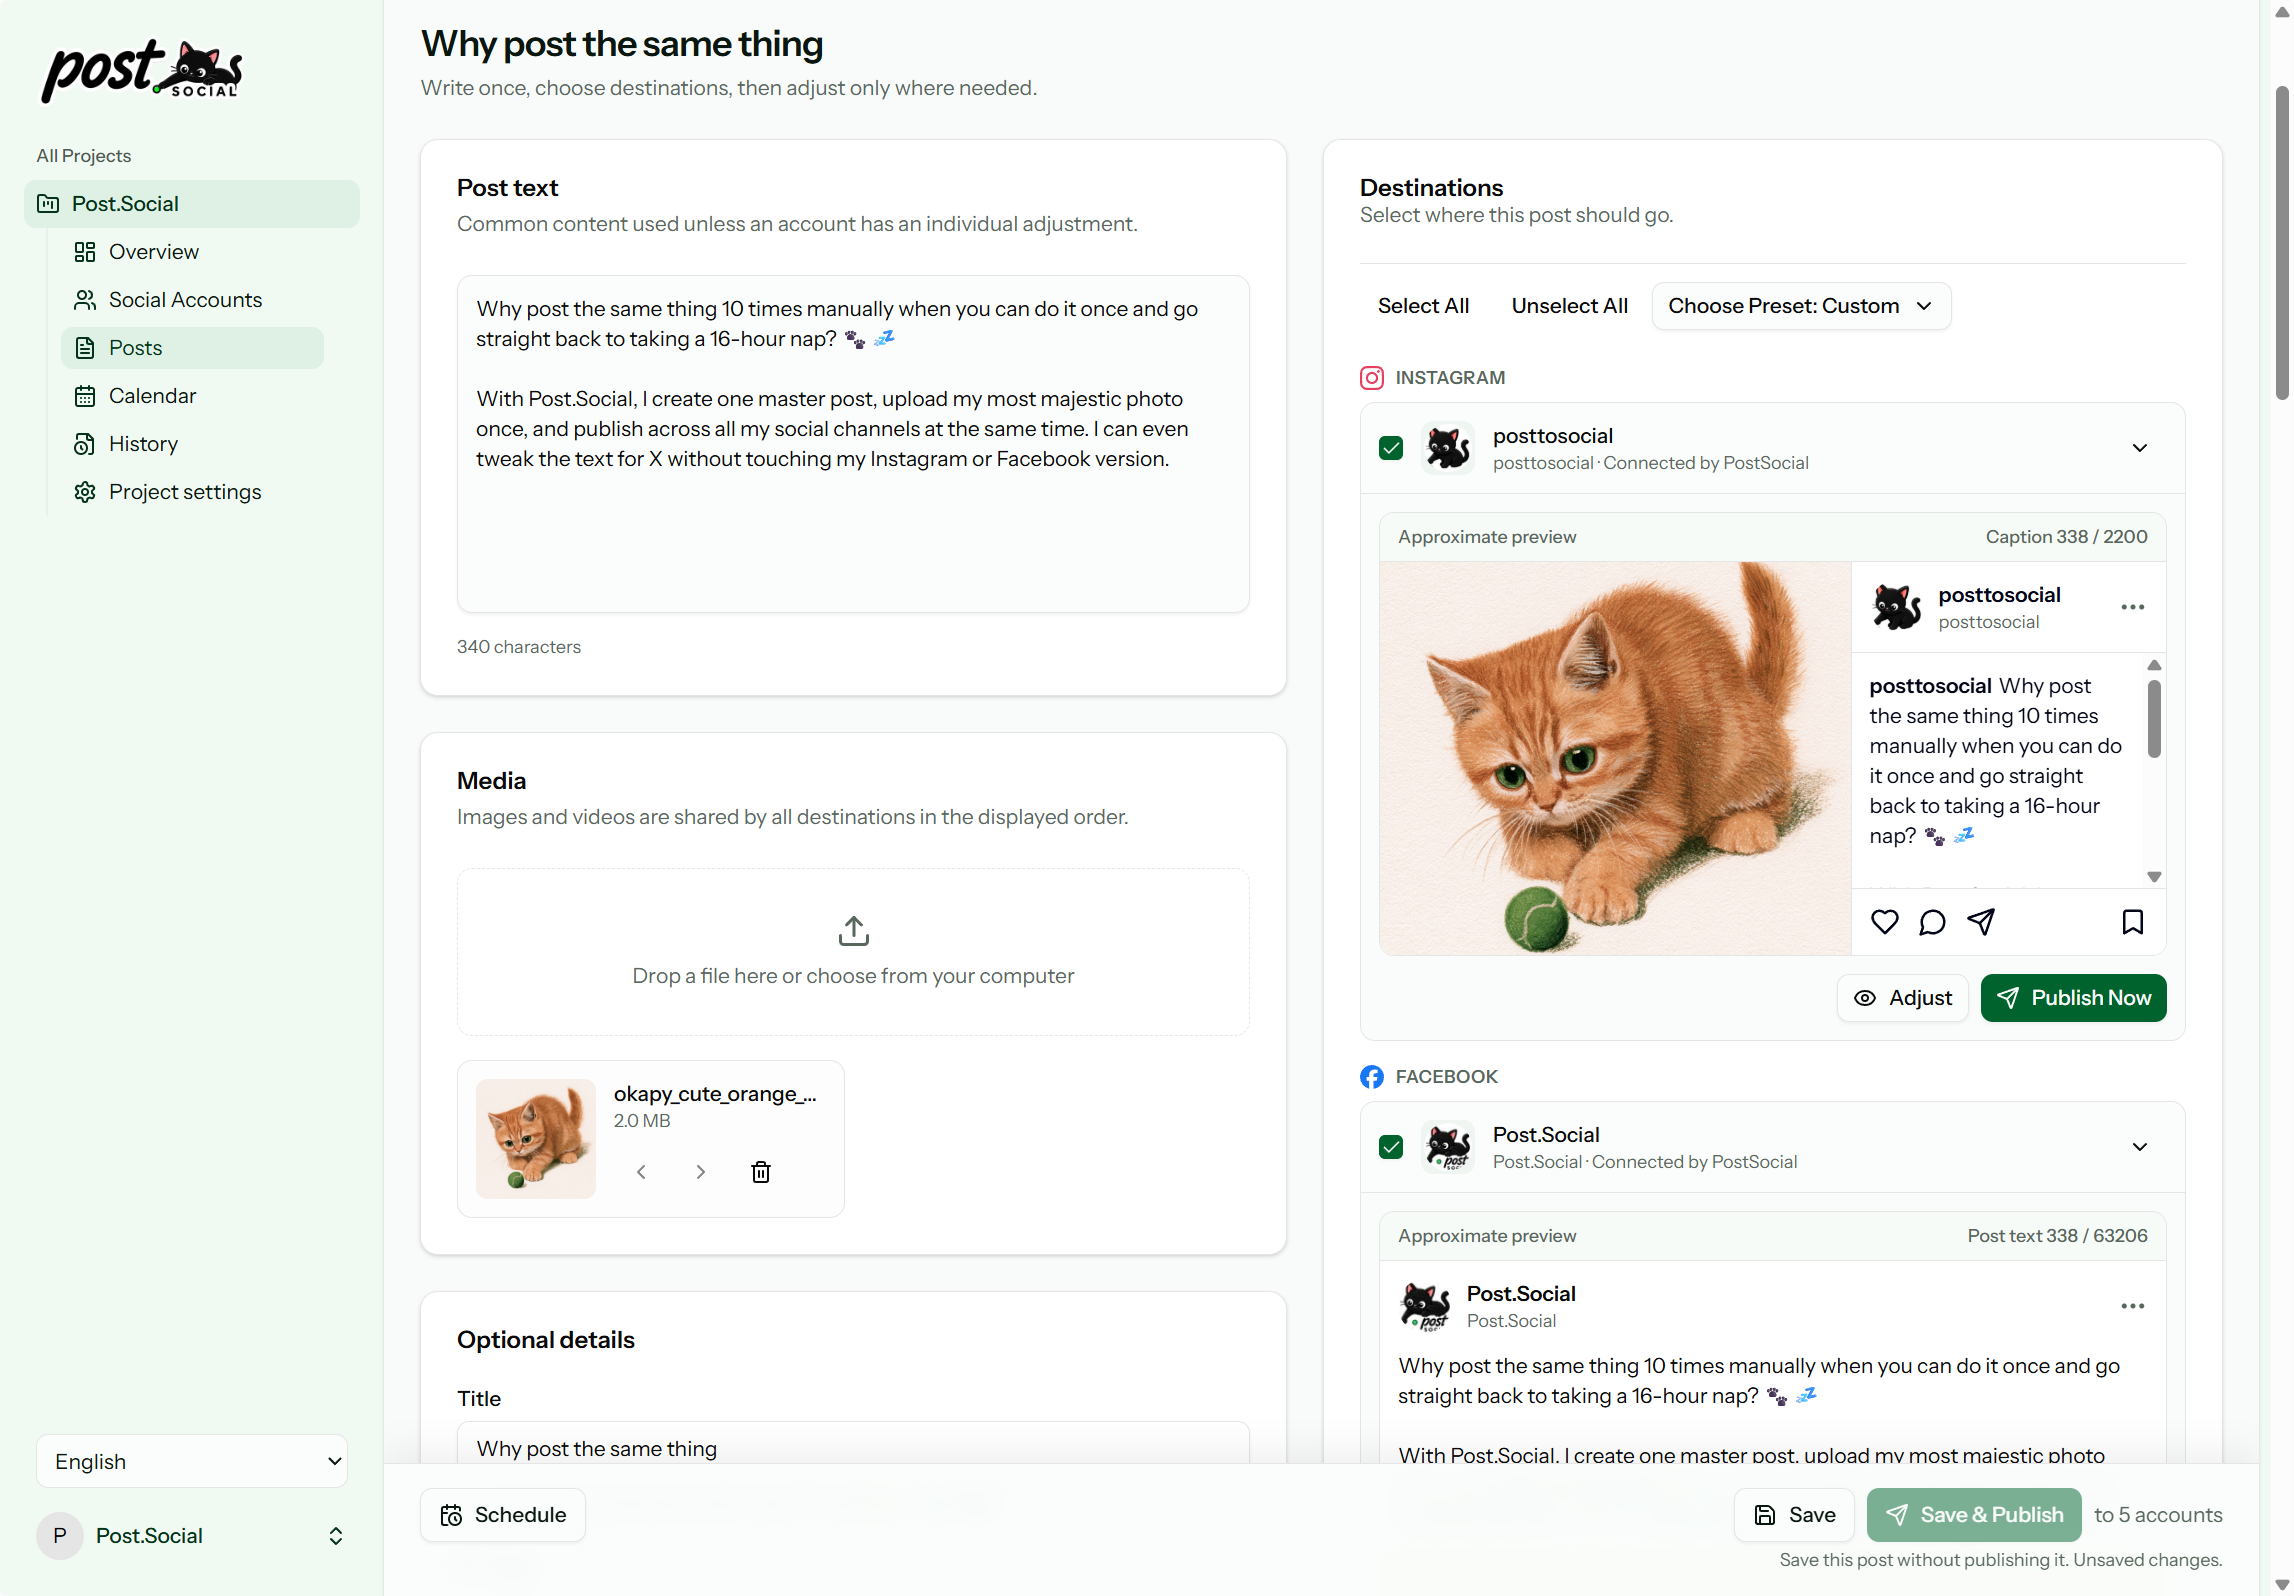
Your master post serves as the base version for every selected account. Instead of recreating content across browser tabs and apps, you prepare it all in a single intuitive editor.
Your uploaded media stays linked to the post, so editing text never requires re-uploading files.
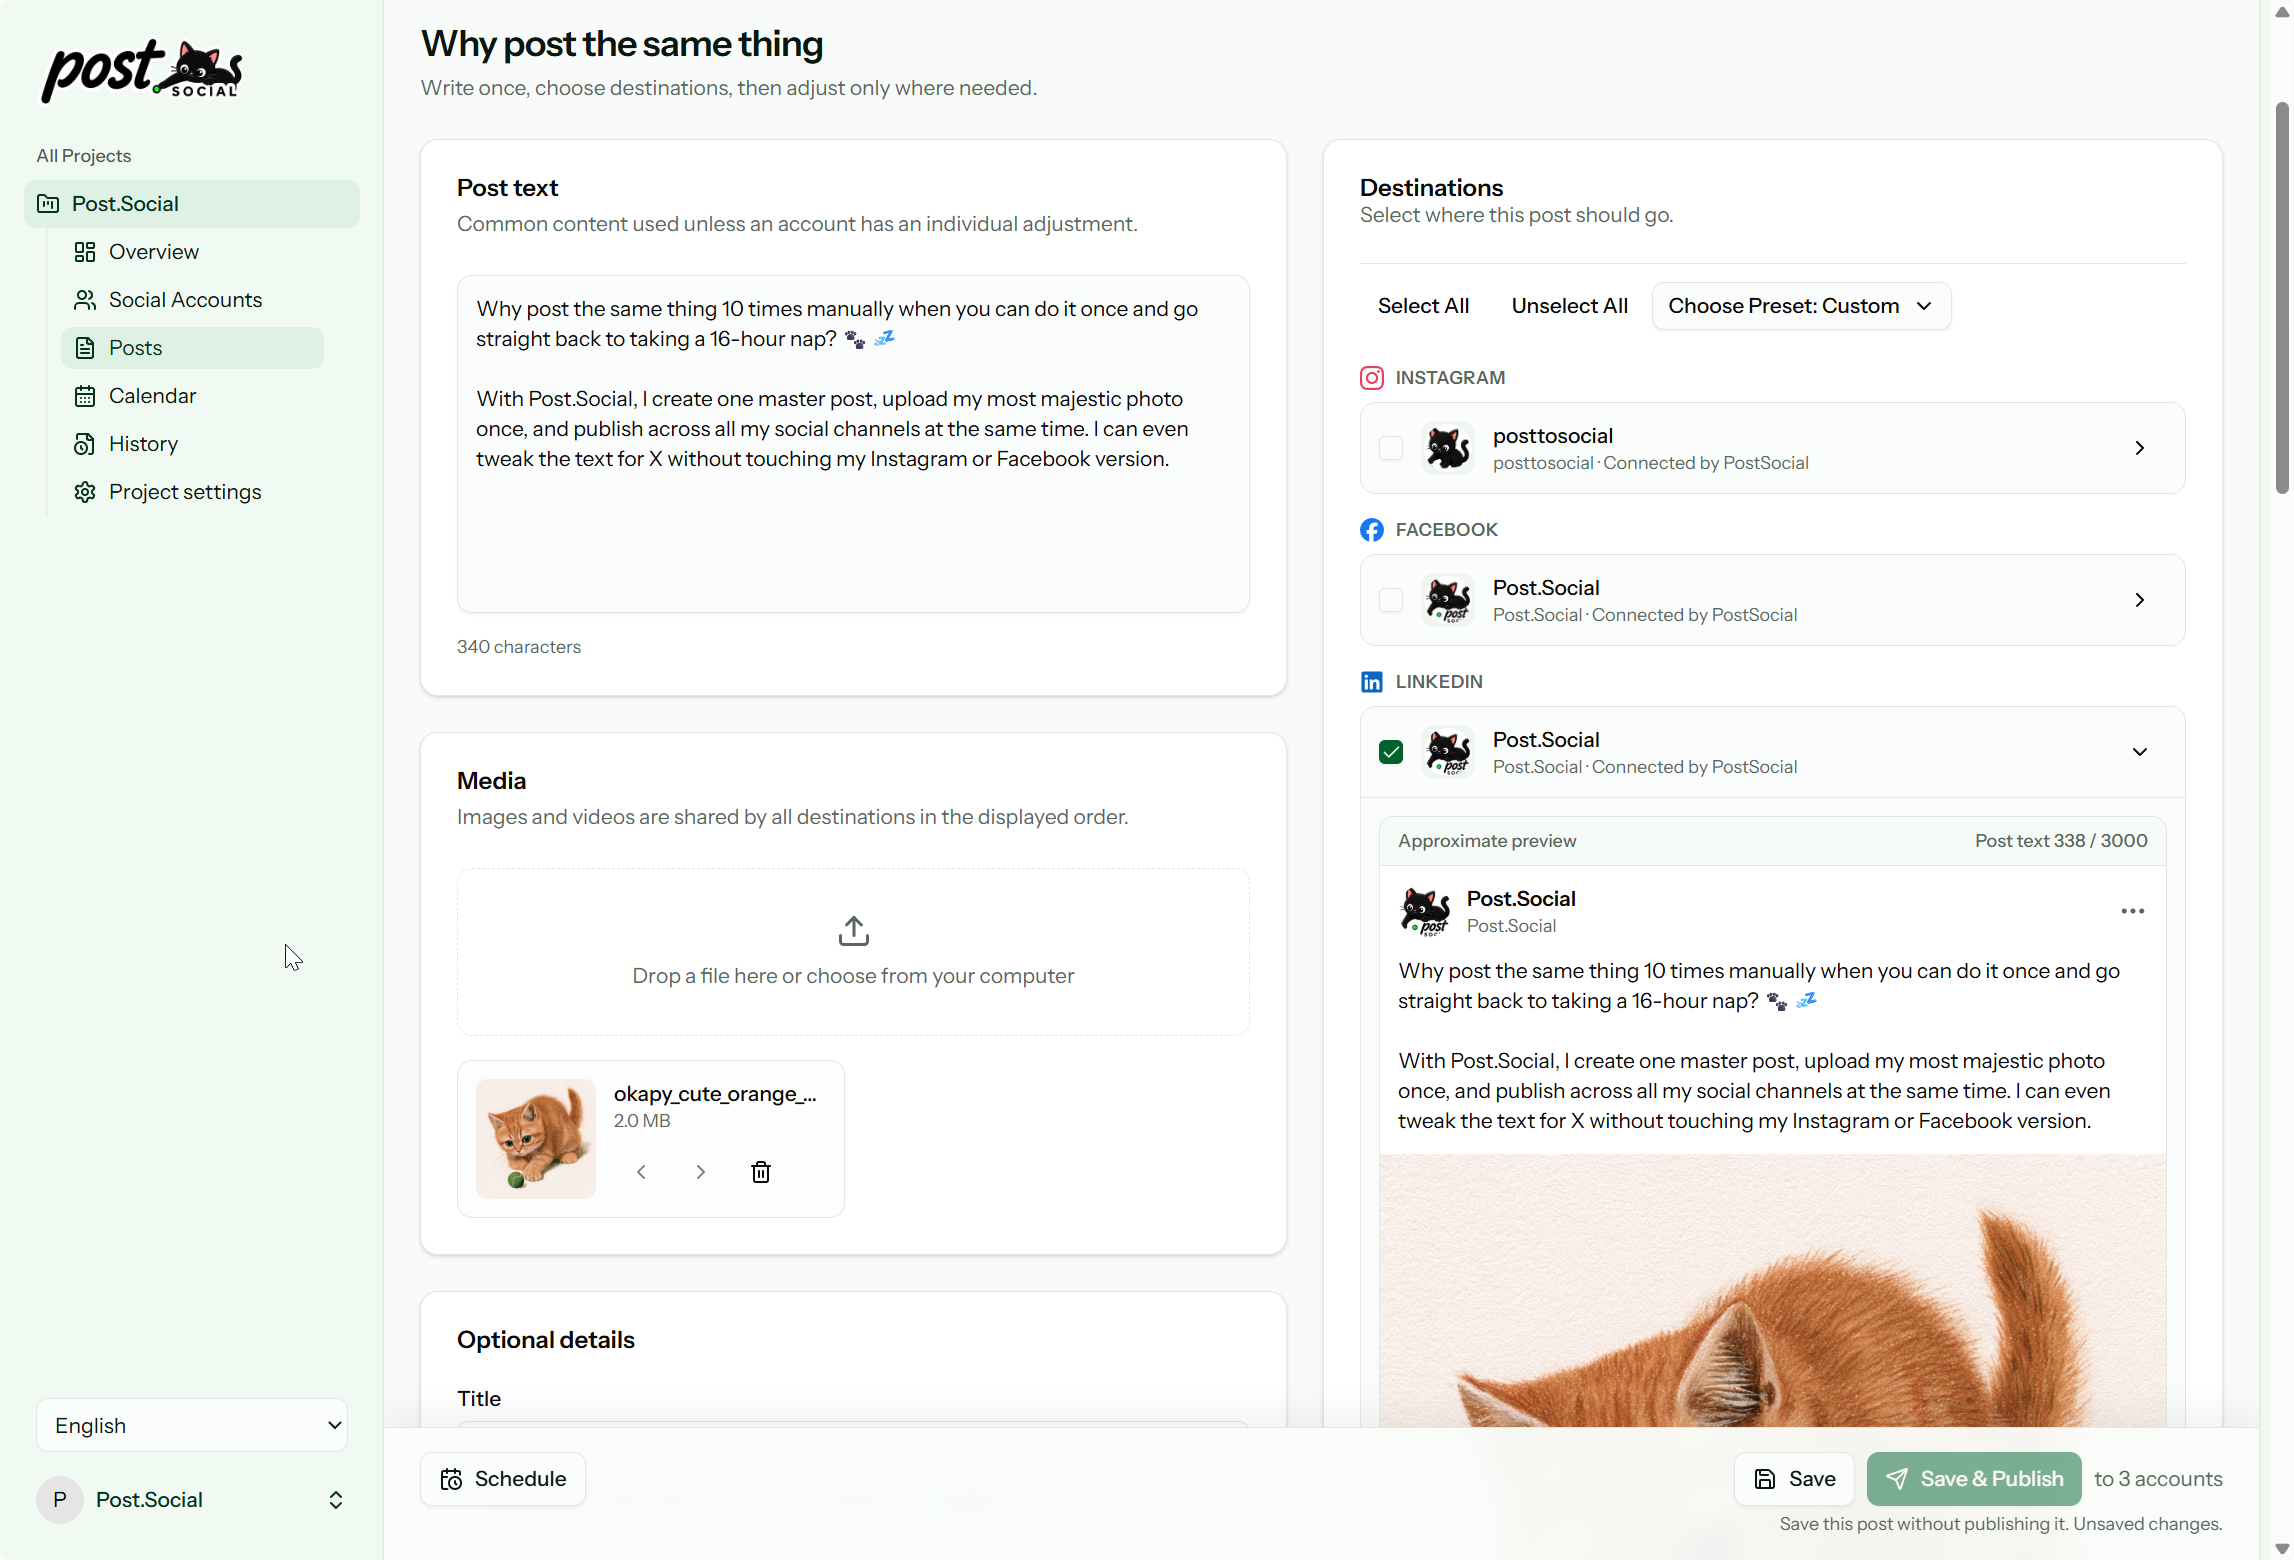
Built-in AI assistance
The built-in AI assistant helps you craft drafts from brief ideas, tune tones for specific channels, or condense long copy to fit X and Bluesky character limits.
You always see the suggestions first. Nothing is saved, scheduled or published until you approve and apply it.
Provide a brief prompt or select existing text to adapt.
Compare proposed variants and regenerate any option with a click.
Keep complete creative control by applying only the copy you like.
Choose the accounts
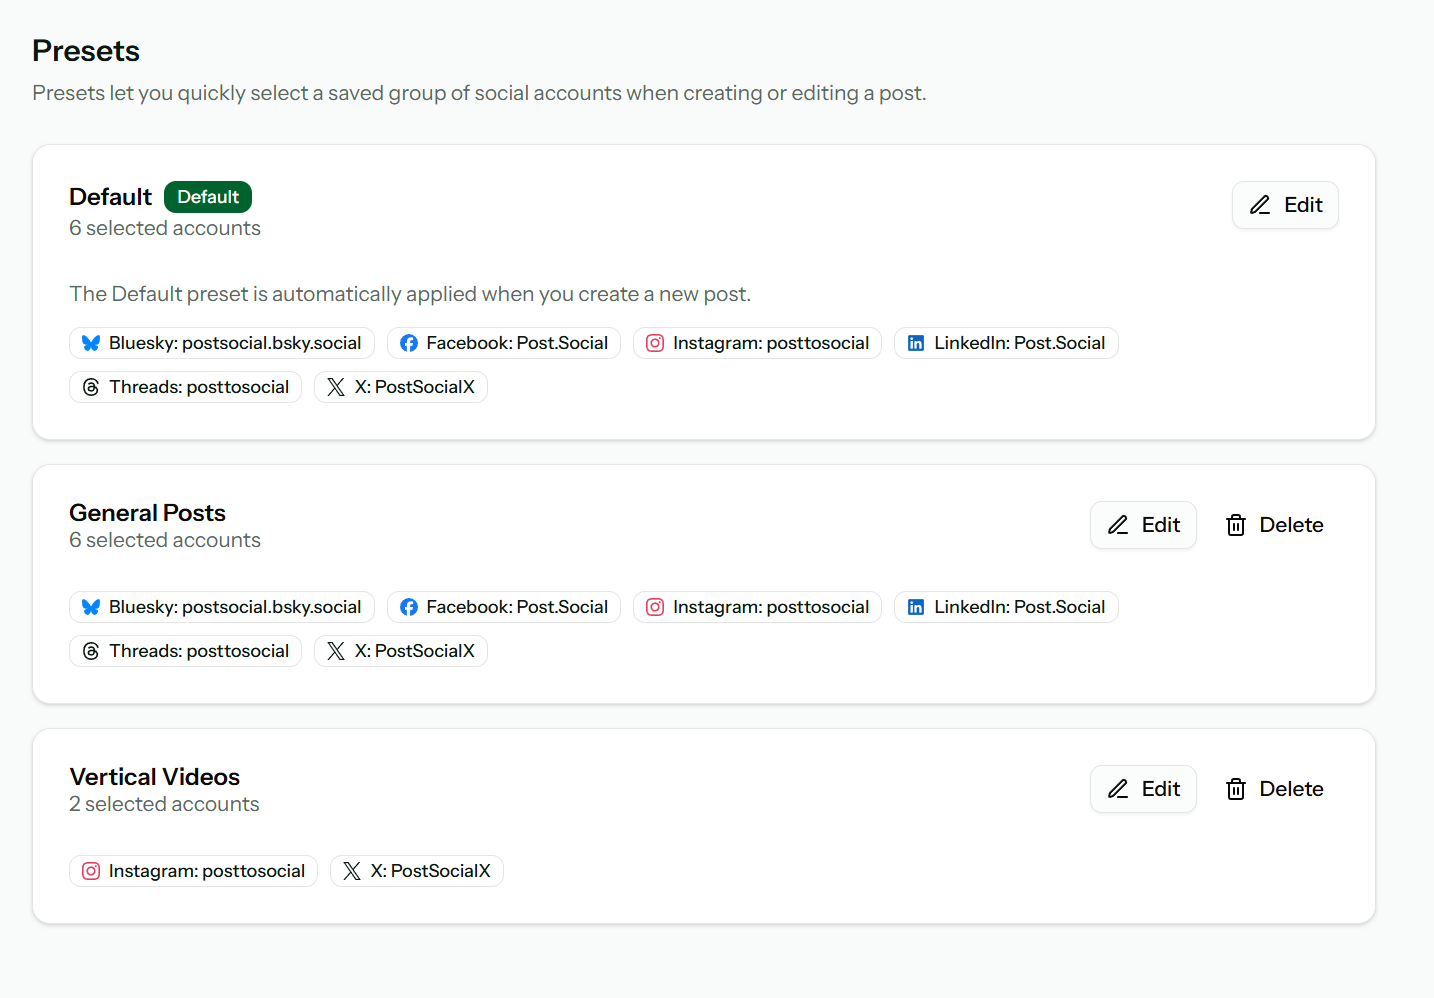
Select one account, a small group or every connected profile. Nothing is posted automatically just because it is connected—you pick the destinations for each post.
Ideal when a post is only intended for specific channels.
Pick recurring groups like “Main Brands” or “Weekly Updates” instantly.
Adjust only where needed
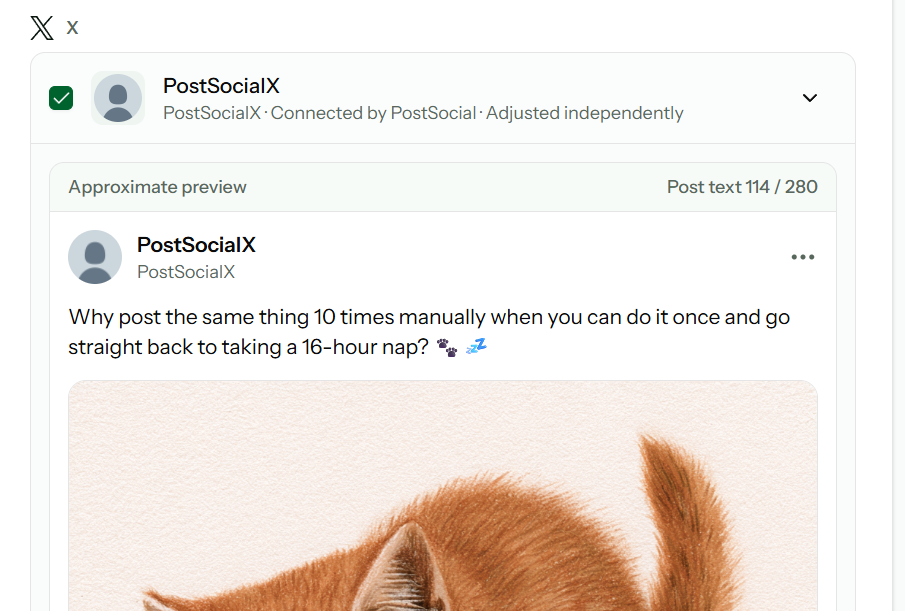
Every destination starts with the master post. Open an individual account preview only when you need custom copy, distinct tags, or specific platform settings.
All customizations stay linked with your post for future editing or rescheduling.
Publish now or schedule
Once your versions look right, publish on your terms in just one step.
Save the content and deliver it to all selected accounts at once. You can also publish directly from any individual account preview.
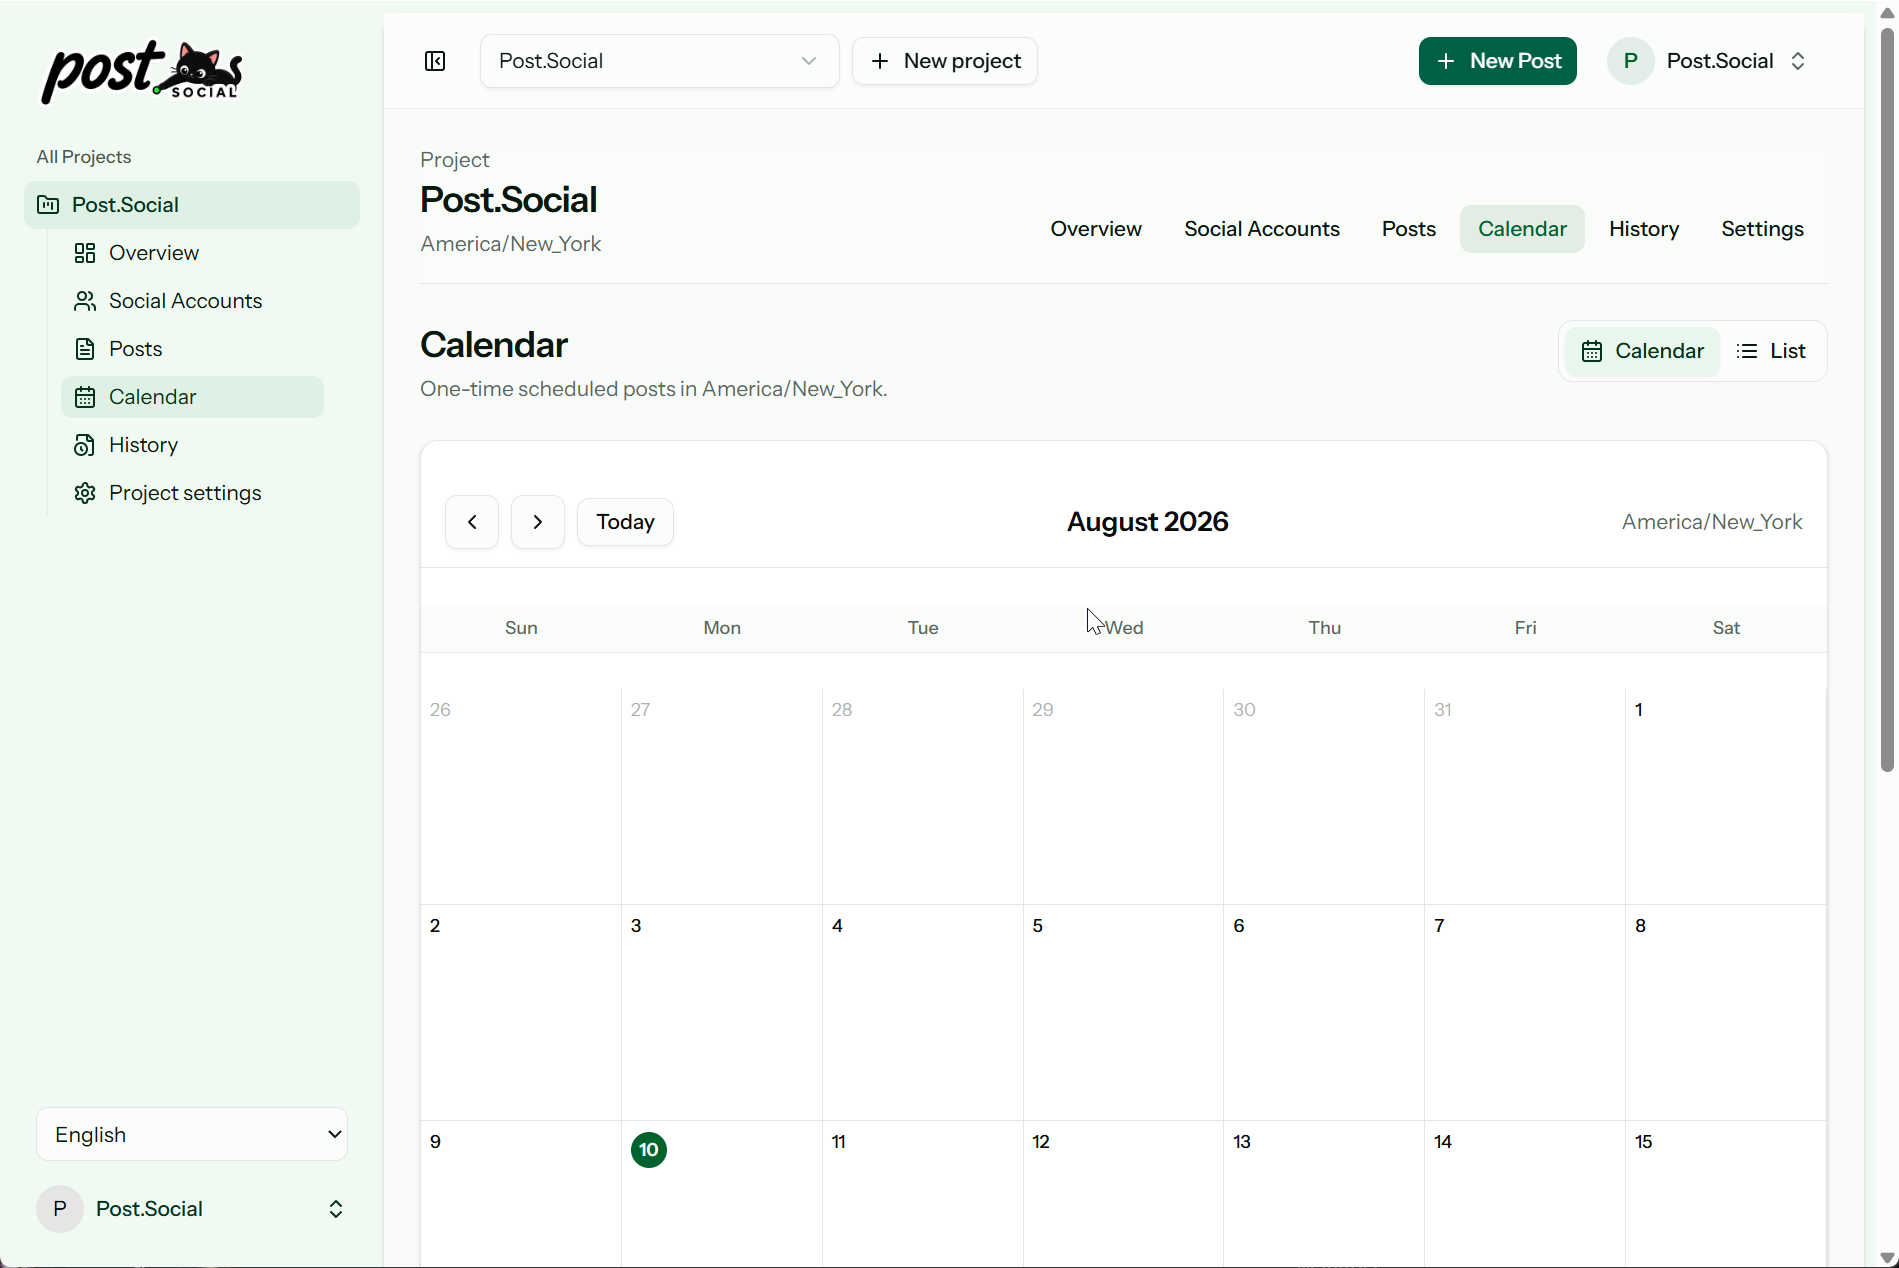
Pick your future date, time and timezone. Your post will be queued in the interactive calendar and timeline until delivery.
Scheduled posts can be updated, moved to another time slot or returned to draft status at any point before delivery.
Reliable Delivery
Post.Social prepares the tailored version for each destination and handles delivery separately. A temporary issue with one network will never disrupt the rest.
01
The exact text, media and parameters sent are permanently logged for each account.
02
Selecting five channels creates five distinct, verifiable deliveries in parallel.
03
Temporary network or API timeouts are retried automatically without charging extra credits.
04
Credits are deducted only upon verified delivery. Unsuccessful attempts never cost a thing.
If nine channels publish and one encounters an error, you see nine verified successes and one clear log—never an ambiguous batch failure.
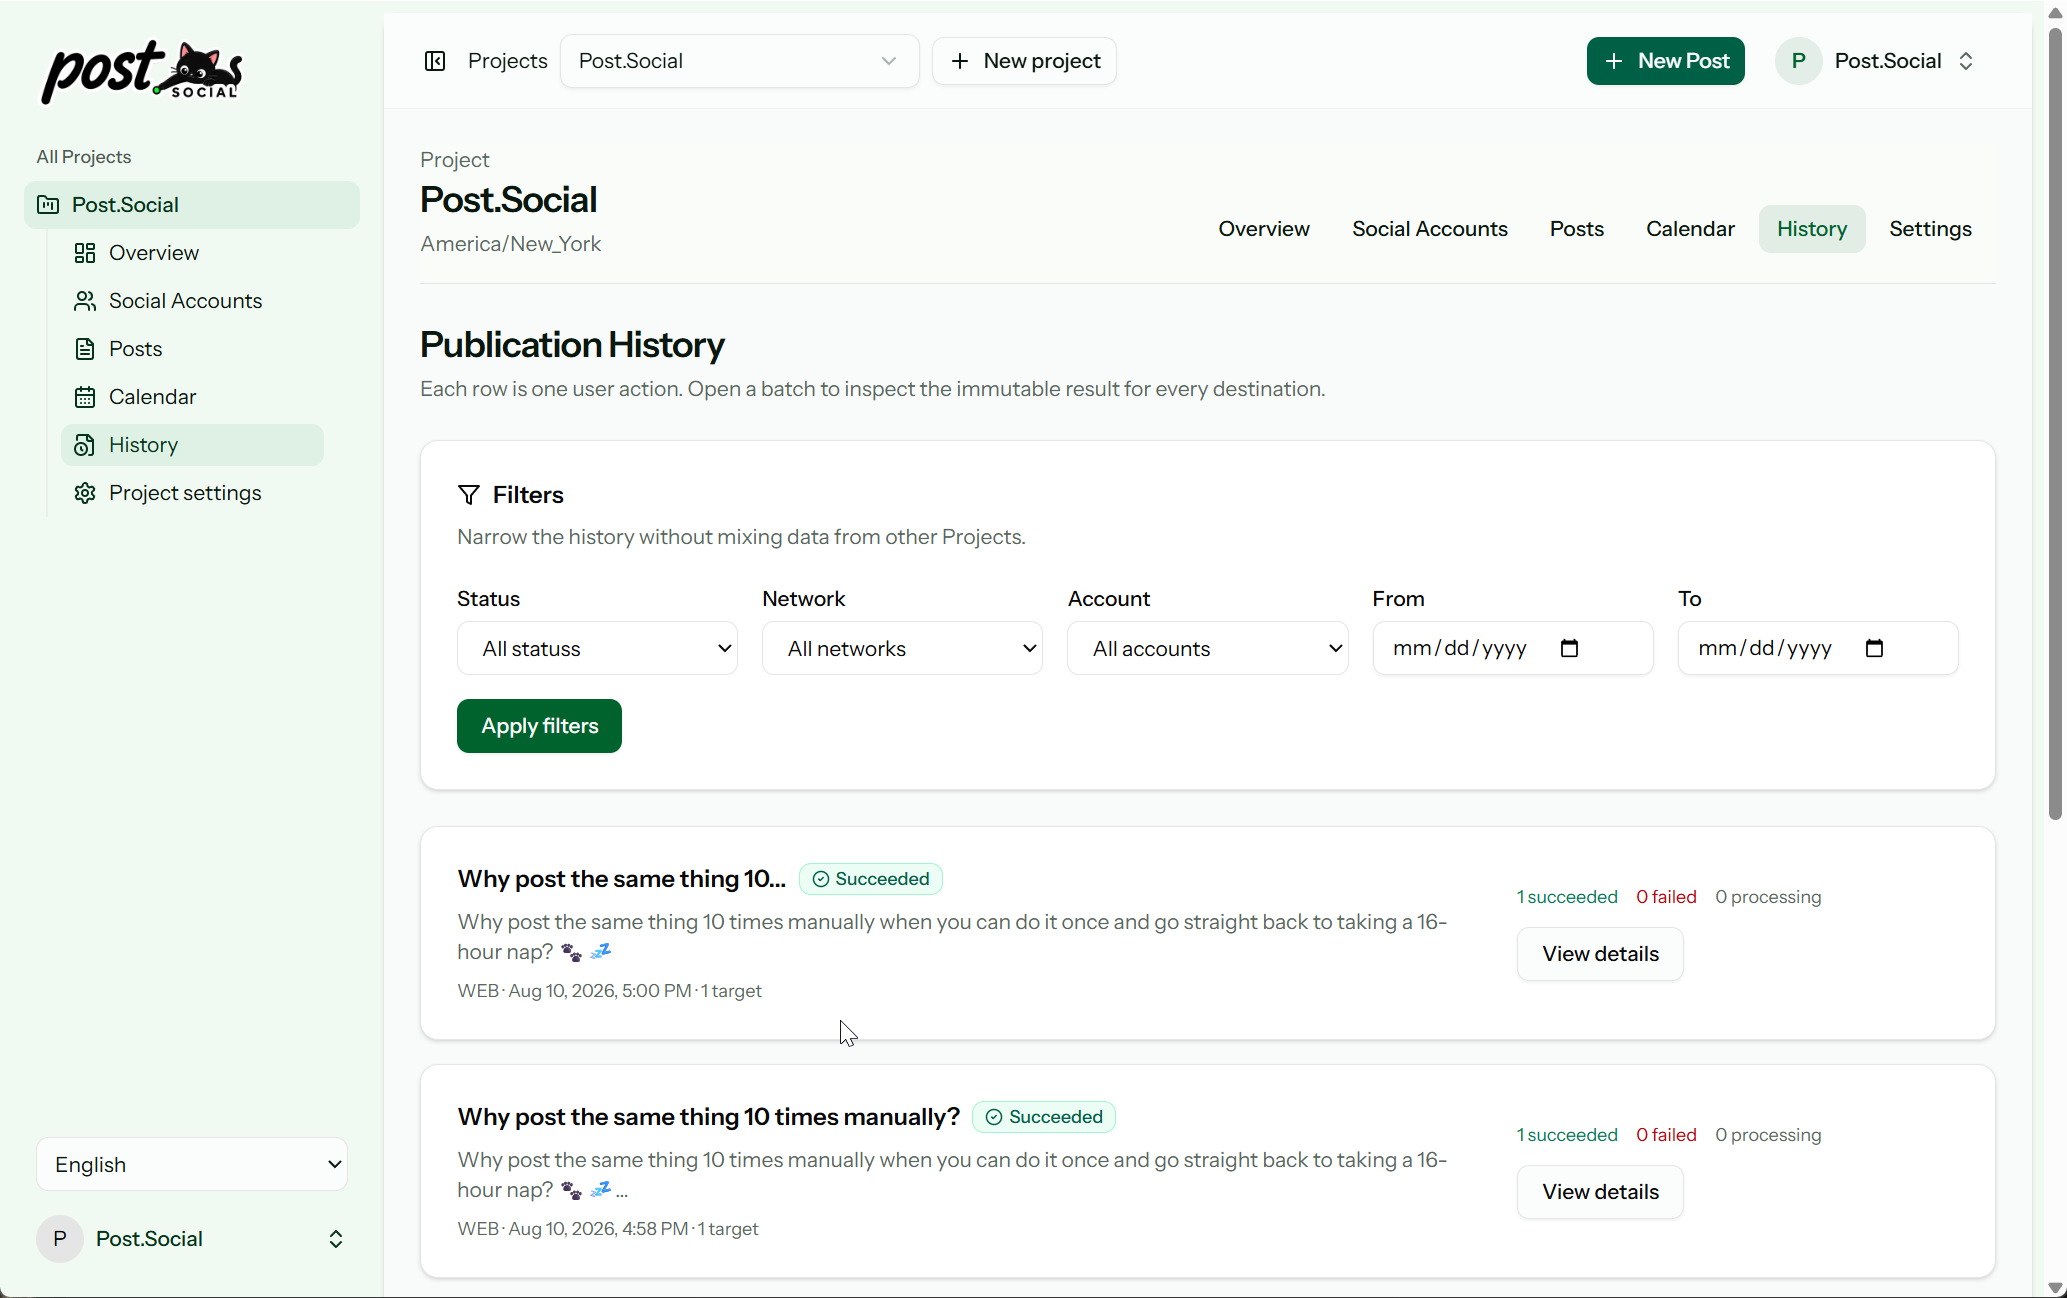
Review the results
The delivery log gives each destination its own real-time status. Confirm successful posts, inspect errors, and see the exact live versions without manual checks across different apps.
Faster subsequent posting
All your creations stay organized in a searchable content library. Update existing posts, refine drafts, or duplicate proven hits to jumpstart new campaigns.
Find past content instantly by title, caption or hashtag.
Clone posts complete with media, presets and channel customizations.
Tweak copy where needed and queue a fresh multi-channel delivery.
For WordPress publishers
Publish to WordPress directly from Post.Social, or plug in your existing SNAP setup without changing how you manage content.
Direct WordPress publishing
Connect your site, compose in Post.Social, and publish rich WordPress articles with media, categories, tags and custom titles.
Post.Social with SNAP
When your post goes live, SNAP hands off delivery to Post.Social for seamless social distribution—free of server timeouts and shared-hosting API limits.
Integration Preview
WordPress connection and SNAP publishing interface
Live screenshot of the native WordPress integration settings and automated hand-off screen.
What disappears from your routine
Common questions
No. Choose exact destinations for each post, use saved channel presets, or publish directly to a single platform preview.
Yes. Photos and video remain shared across the post, while captions, titles, hashtags and custom settings can be tailored per channel.
Yes. Save complete drafts with uploaded media, chosen accounts and custom variations to resume whenever you are ready.
The rest of your accounts publish unaffected. The delivery log marks successful deliveries and provides clear error details for the failed channel.
Yes. Up until delivery time, you can edit text, swap media, adjust dates or return the post back to draft status.
One credit equals one successfully delivered post to one account. Failed posts and automatic background retries never consume your credits.
Start free, connect your favorite platforms and share your ideas everywhere from one effortless workspace.
14-day free trial. No credit card required.